Post by stinkiesdaddy on Feb 14, 2010 14:05:57 GMT -6
Let's continue our look at spinning reels.
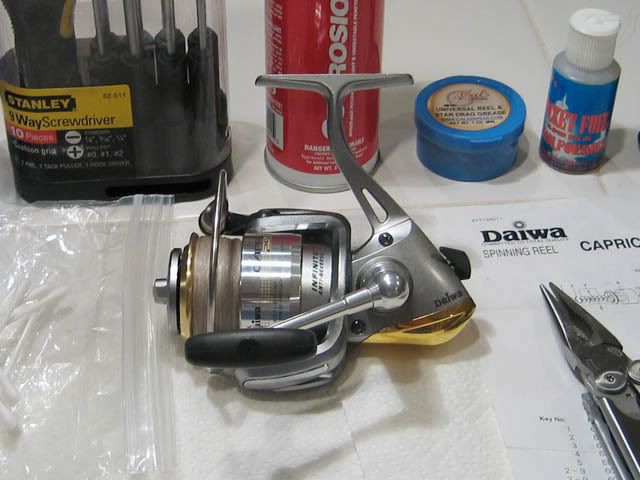
In this segment, we will be removing the rotor, cleaning the main shaft, roller bearing and taking a look at the main gear assembly. The sample used for this segment is a Daiwa Capricorn 2500. All of the previous disclaimers regarding differences in models and makers, yadda yadda yadda, apply here especially.
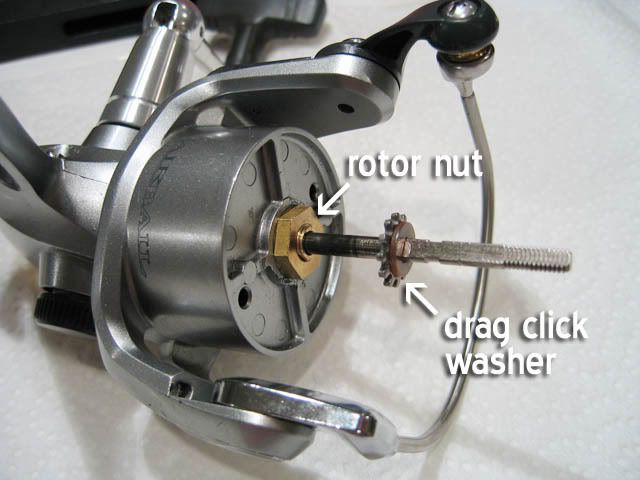
If you haven't done so, take the spool off. The rotor assembly can be removed by pulling off the drag click gear and unscrewing the rotor nut. Take a close look at the rotor in the vicinity of the rotor nut. I once had a difficult time unscrewing the nut of an Okuma Coronado. Just couldn't get the nut turned. Upon closer inspection of the rotor, I spied a little arrow that was in the opposite direction of how I was turning. Some reels have rotor nuts that unscrew clockwise!
The picture below shows the reel with the rotor assembly removed. The long thing is the main shaft. This is what the spool rests on. As the handle is turned, the rotor is turned around the main shaft. This is the mechanism which winds your line onto the spool. Handle rotation also causes the main shaft to extend and retract in a smooth periodic oscillation. This causes the line to be wrapped around the spool evenly, front to back. Inspect this area closely. If there is no visible sand/salt intrusion, I would highly recommend that you proceed no further unless you are a serious tinkerer.
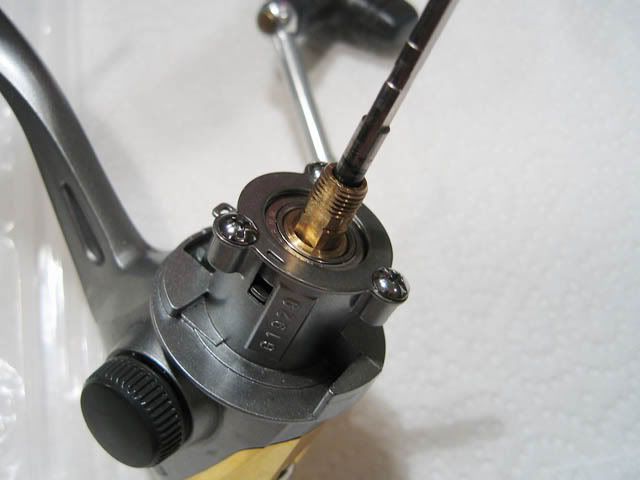
Removing the three screws and the retainer allows the main shaft bearing and the roller bearing assembly to be removed. Note that the main shaft bearing is big AND sealed. It's very common for salt and sand to creep into this area so a sealed bearing is important.
The roller bearing is also known as the "anti-reverse" bearing. TAKE YOUR TIME here! Make sure you disassemble it slowly and logically and have your reel's schematic nearby. It's a good idea to take a few pieces off at a time and then put them back on just to imprint the proper reassembly sequence into your memory. And remember: at this stage, the reel will NOT operate smoothly if the handle is turned. This is normal. Most reels require the rotor in place and the rotor nut to be tightened before everything works as it should.
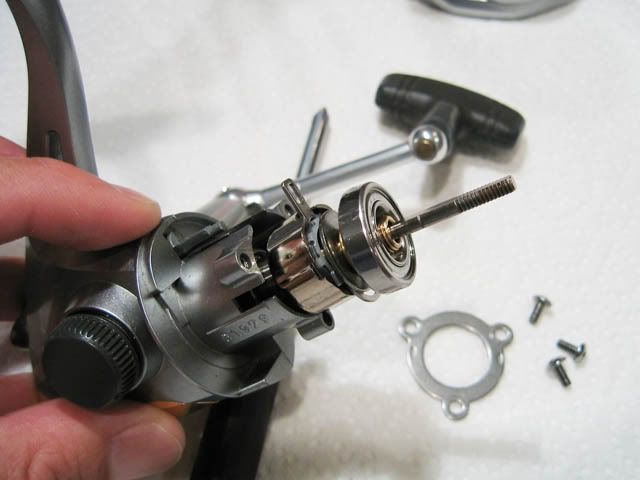
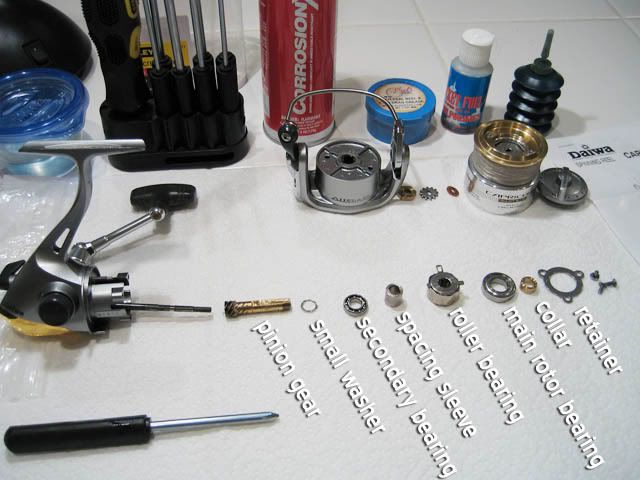
If you want to proceed, remove each piece and place them in your work area in order of disassembly. Keep the roller bearing assembly intact for now. The following picture shows the main shaft parts for the Daiwa Capricorn 2500.
Cleaning should be done one part a time until you are familiar with this area. This means taking ONE PART and dumping it into your white gas bath to remove the grease and dirt. White gas is a very effective degreaser so each part needs to be dryed, relubricated and then placed back into the assembly line.
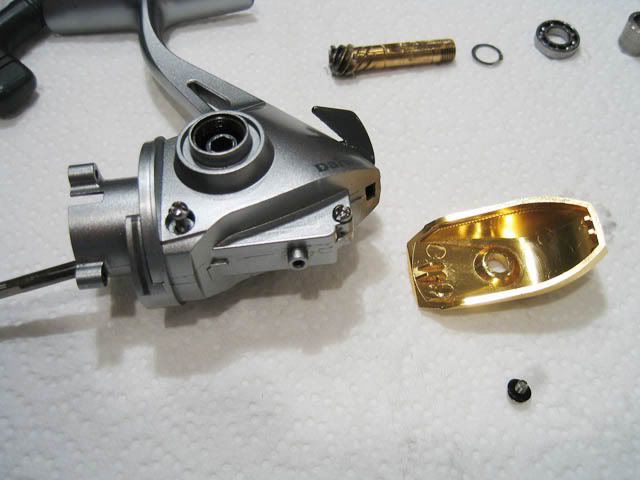
The roller bearing of this Daiwa is comprised of the parts shown below:

Shimano's version of the roller bearing can be quite different from Daiwa's. It usually consists of an independent plastic clamshell assembly held together by small screws. My suggestion here would be to keep this assembly intact and perform the cleaning without taking it apart.
Once the main shaft parts have been cleaned and relubed, you should reassemble. But since I'm familiar with this reel, I will go straight to the main gear housing. Many modern spinning reels have a plastic scratch guard that needs to be taken off before the side plate is removed.
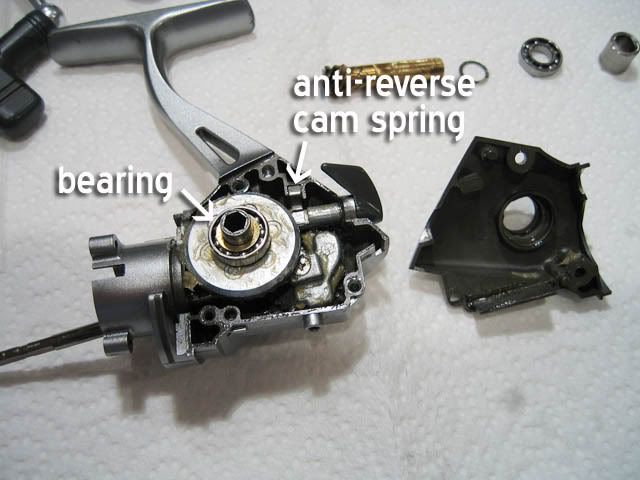
Once the side plate is removed, you can see the gears within. Before you take anything else apart, turn the gear with your fingers and note how each part interacts with the others. Flip the anti-reverse switch back and forth and see how it would engage with the clutch cam of the roller bearing assembly. Take a look at the bearing in the picture below. Some reels may have a bushing here. If it is a bearing and an open one at that, pay particular attention to it as open bearings in this area can become easily reached by contaminants as it is relatively close to the outside of the reel.
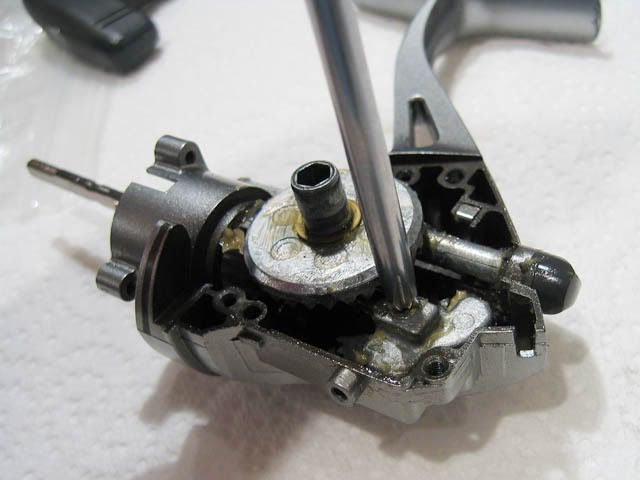
In order to remove all of the gears, it is usually necessary to remove the main shaft. In this case it is attached to the oscillating slider by screw.
Once the rotor is removed, it is a simple matter of removing the gears. If sand has made its way in here, it will be necessary to degrease these gears completely by dipping in white gas as well cleaning out the body and sideplate. An old toothbrush comes in handy for cleaning the teeth of gears. Once the gears have been cleaned and dryed, apply reel grease liberally to all of the working surfaces of the gears. Again, an old toothbrush is a handy tool for this. It is imperative to use proper grease here. The little tube of lubricant that comes with most reels is useless as a gear lubricant as it is too light and will simply drip off. Proper grease will have the consistency of peanut butter and will remain in place indefinitely.
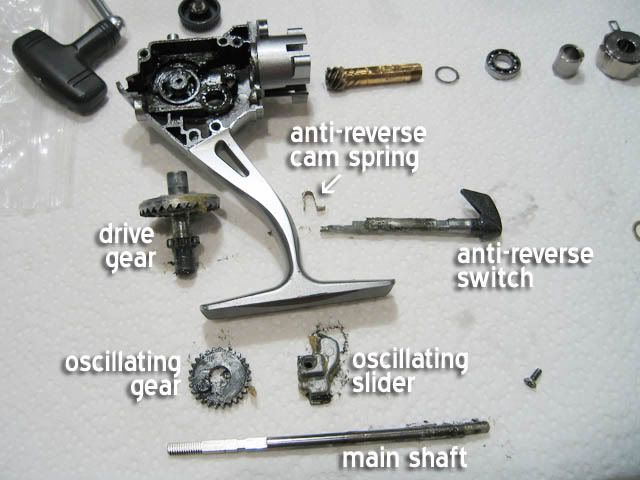
Once the parts have been lubed, you can put all the parts back together. Hopefully it works and you will have no little parts left over.
Article written by:
John Kim (aka JKim)
In this segment, we will be removing the rotor, cleaning the main shaft, roller bearing and taking a look at the main gear assembly. The sample used for this segment is a Daiwa Capricorn 2500. All of the previous disclaimers regarding differences in models and makers, yadda yadda yadda, apply here especially.
If you haven't done so, take the spool off. The rotor assembly can be removed by pulling off the drag click gear and unscrewing the rotor nut. Take a close look at the rotor in the vicinity of the rotor nut. I once had a difficult time unscrewing the nut of an Okuma Coronado. Just couldn't get the nut turned. Upon closer inspection of the rotor, I spied a little arrow that was in the opposite direction of how I was turning. Some reels have rotor nuts that unscrew clockwise!

The picture below shows the reel with the rotor assembly removed. The long thing is the main shaft. This is what the spool rests on. As the handle is turned, the rotor is turned around the main shaft. This is the mechanism which winds your line onto the spool. Handle rotation also causes the main shaft to extend and retract in a smooth periodic oscillation. This causes the line to be wrapped around the spool evenly, front to back. Inspect this area closely. If there is no visible sand/salt intrusion, I would highly recommend that you proceed no further unless you are a serious tinkerer.

Removing the three screws and the retainer allows the main shaft bearing and the roller bearing assembly to be removed. Note that the main shaft bearing is big AND sealed. It's very common for salt and sand to creep into this area so a sealed bearing is important.
The roller bearing is also known as the "anti-reverse" bearing. TAKE YOUR TIME here! Make sure you disassemble it slowly and logically and have your reel's schematic nearby. It's a good idea to take a few pieces off at a time and then put them back on just to imprint the proper reassembly sequence into your memory. And remember: at this stage, the reel will NOT operate smoothly if the handle is turned. This is normal. Most reels require the rotor in place and the rotor nut to be tightened before everything works as it should.

If you want to proceed, remove each piece and place them in your work area in order of disassembly. Keep the roller bearing assembly intact for now. The following picture shows the main shaft parts for the Daiwa Capricorn 2500.

Cleaning should be done one part a time until you are familiar with this area. This means taking ONE PART and dumping it into your white gas bath to remove the grease and dirt. White gas is a very effective degreaser so each part needs to be dryed, relubricated and then placed back into the assembly line.
The roller bearing of this Daiwa is comprised of the parts shown below:

Shimano's version of the roller bearing can be quite different from Daiwa's. It usually consists of an independent plastic clamshell assembly held together by small screws. My suggestion here would be to keep this assembly intact and perform the cleaning without taking it apart.
Once the main shaft parts have been cleaned and relubed, you should reassemble. But since I'm familiar with this reel, I will go straight to the main gear housing. Many modern spinning reels have a plastic scratch guard that needs to be taken off before the side plate is removed.

Once the side plate is removed, you can see the gears within. Before you take anything else apart, turn the gear with your fingers and note how each part interacts with the others. Flip the anti-reverse switch back and forth and see how it would engage with the clutch cam of the roller bearing assembly. Take a look at the bearing in the picture below. Some reels may have a bushing here. If it is a bearing and an open one at that, pay particular attention to it as open bearings in this area can become easily reached by contaminants as it is relatively close to the outside of the reel.

In order to remove all of the gears, it is usually necessary to remove the main shaft. In this case it is attached to the oscillating slider by screw.

Once the rotor is removed, it is a simple matter of removing the gears. If sand has made its way in here, it will be necessary to degrease these gears completely by dipping in white gas as well cleaning out the body and sideplate. An old toothbrush comes in handy for cleaning the teeth of gears. Once the gears have been cleaned and dryed, apply reel grease liberally to all of the working surfaces of the gears. Again, an old toothbrush is a handy tool for this. It is imperative to use proper grease here. The little tube of lubricant that comes with most reels is useless as a gear lubricant as it is too light and will simply drip off. Proper grease will have the consistency of peanut butter and will remain in place indefinitely.

Once the parts have been lubed, you can put all the parts back together. Hopefully it works and you will have no little parts left over.


Article written by:
John Kim (aka JKim)


